

1. A Moleskine!
2. Sticky tabs (5-6 (5 yellow and 4 blue preferably))
3. Post-it notes
4. A pen
5. A ruler
The first thing you will need to do is number all the pages in the bottom right (or top if you want). I did every odd number. Then, get your sticky tabs. You will have 5 tabs: Inbox, Someday, Projects, (if you have a blog you can have a another one titled Blog), research and book recommendations.
On page 1, write at the top ‘abbreviations’. This is a section where you put words and abbreviations you come across when reading and want to look up later.
I didn’t have any sticky tabs, so I just cut up post-it notes and wrote on them then stuck them in with glue. On page , place a tab and title it as ‘Inbox’. This is were everything will go; place website info, calendar dates, to-dos and notes here. Some will be moved to the Project tab or other tabs.
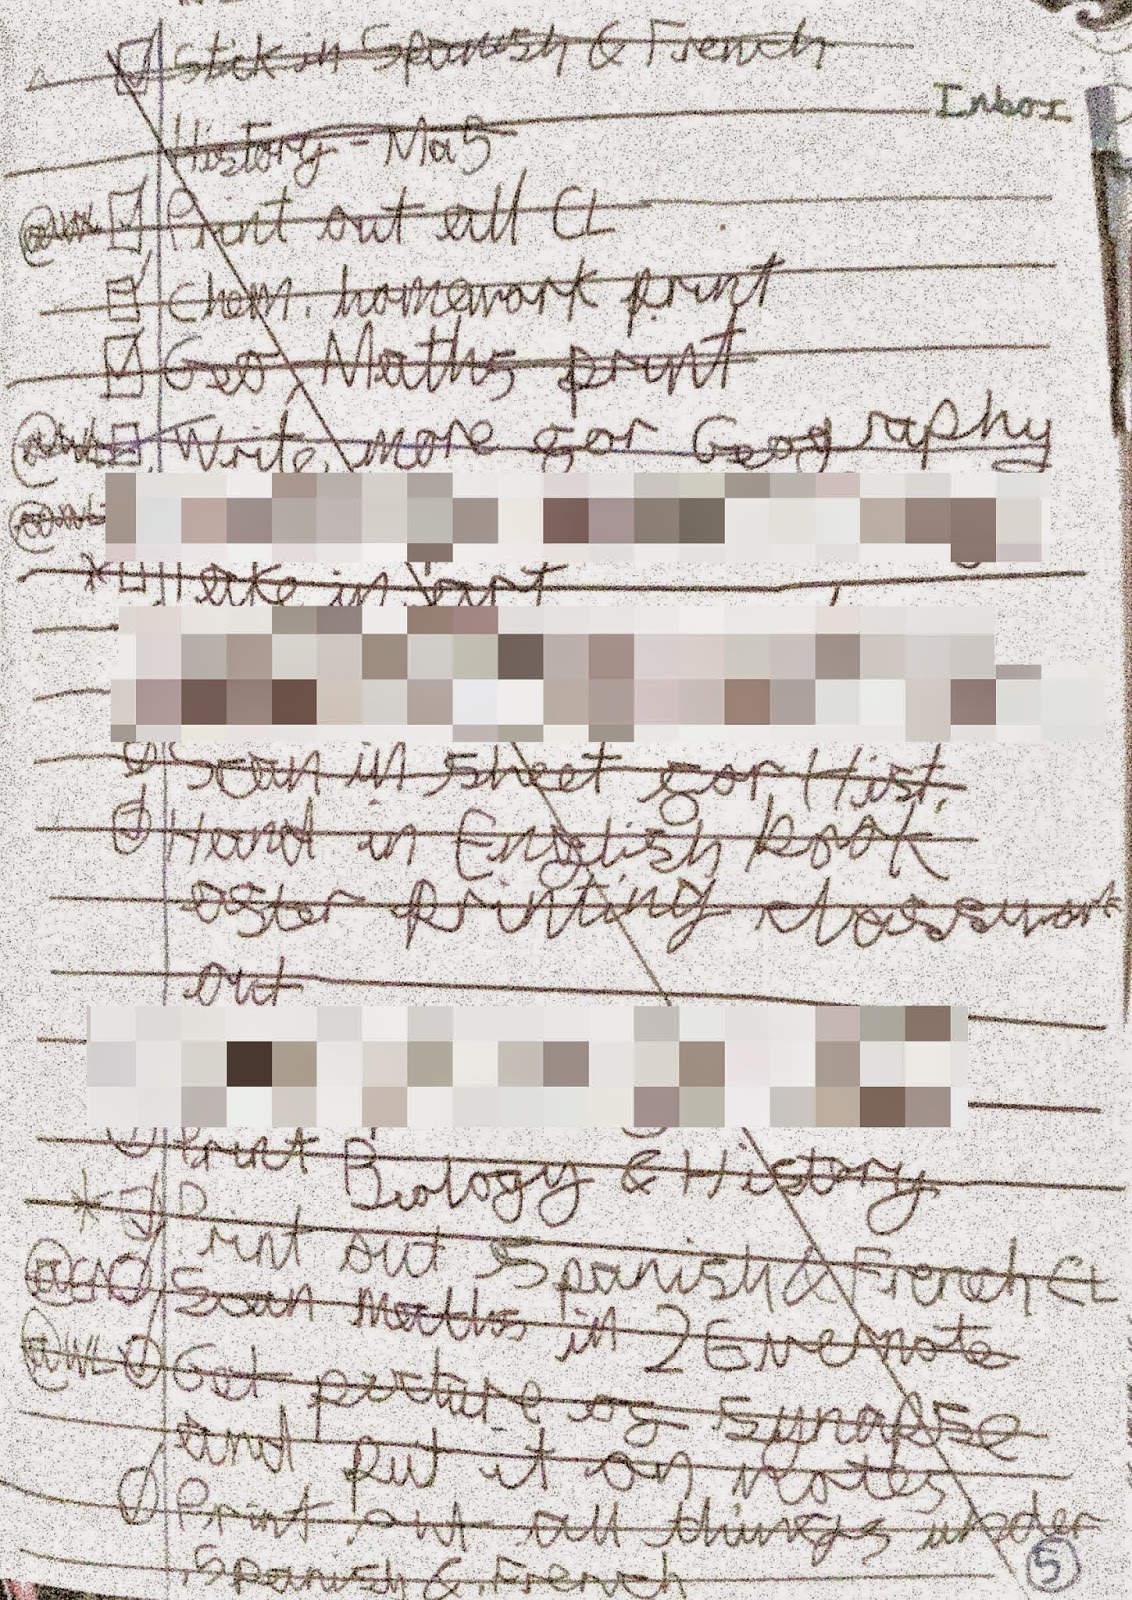 |
| The Inbox tab |
Then, place the ‘Someday’ tab on page 50. This is where everything you want to do someday goes e.g: Go on holiday to Florida.
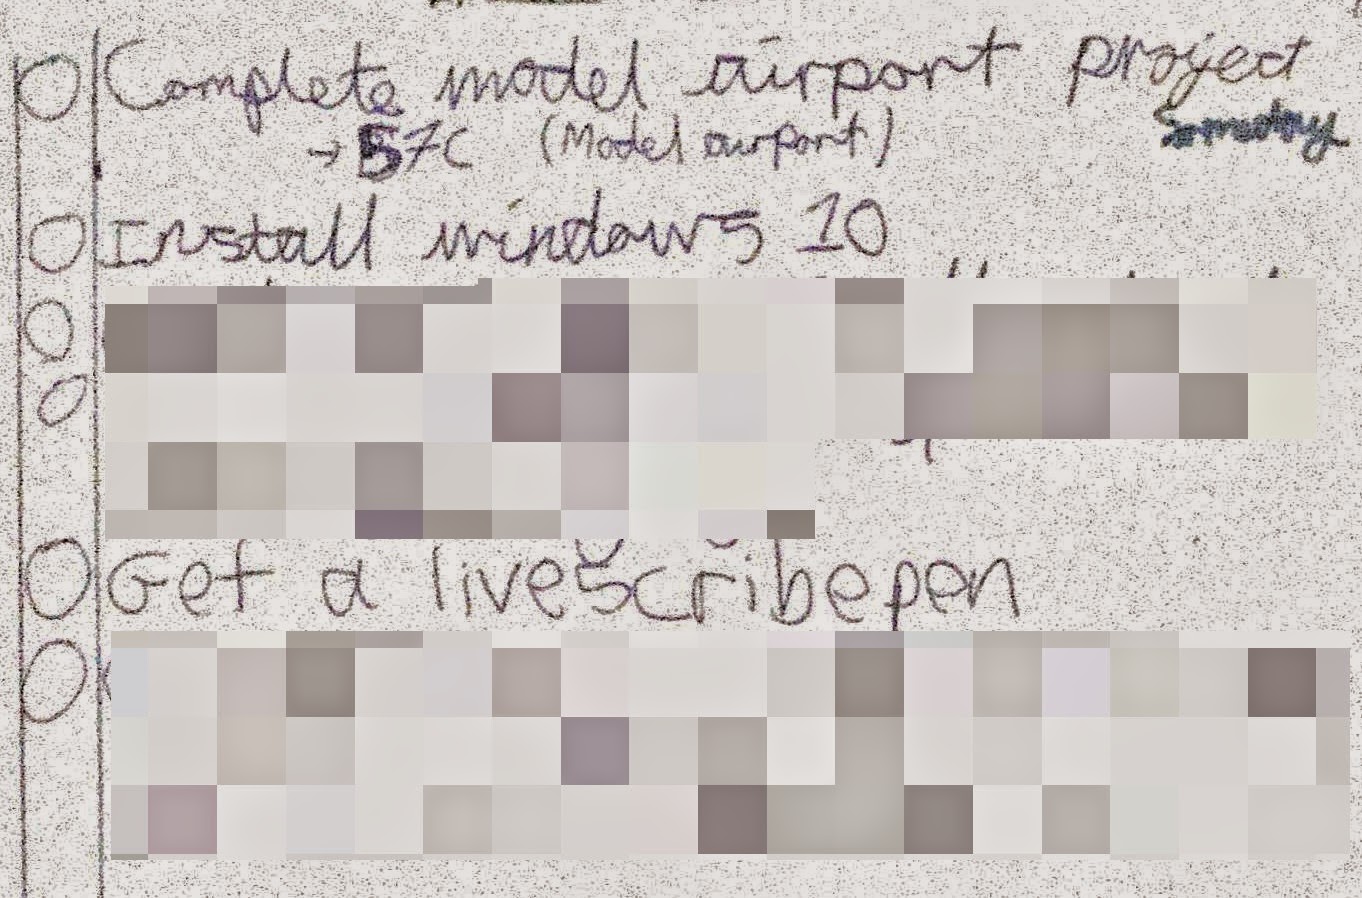 |
| The Someday tab |
Then, I have the Projects tab on page 57. I put it here as I did not think I would put much into ‘Someday’. The projects tab is where all tasks which have more than one tasks. Projects can also have notes. If I was doing a project on the ancient city on Mycenae, I would put all my notes, to-dos, website links and other things in that project.
 |
| The Projects tab |
Next comes the vital student tab: the ‘Research’ tab. I have this on page 101. This is where you write notes, research questions and make mindmaps. This is probably my second most used area of my Moleskine. I then have a blog tab (on page 153), which is basically a glorified to-do list, but if you don’t have a blog, there is basically no point to this tab.
 |
| The Research tab |
The next essential tab for a student is the book recommendations (I have gone a bit further than that and have added YouTube videos, music, e.t.c). This section also grows quite quickly.
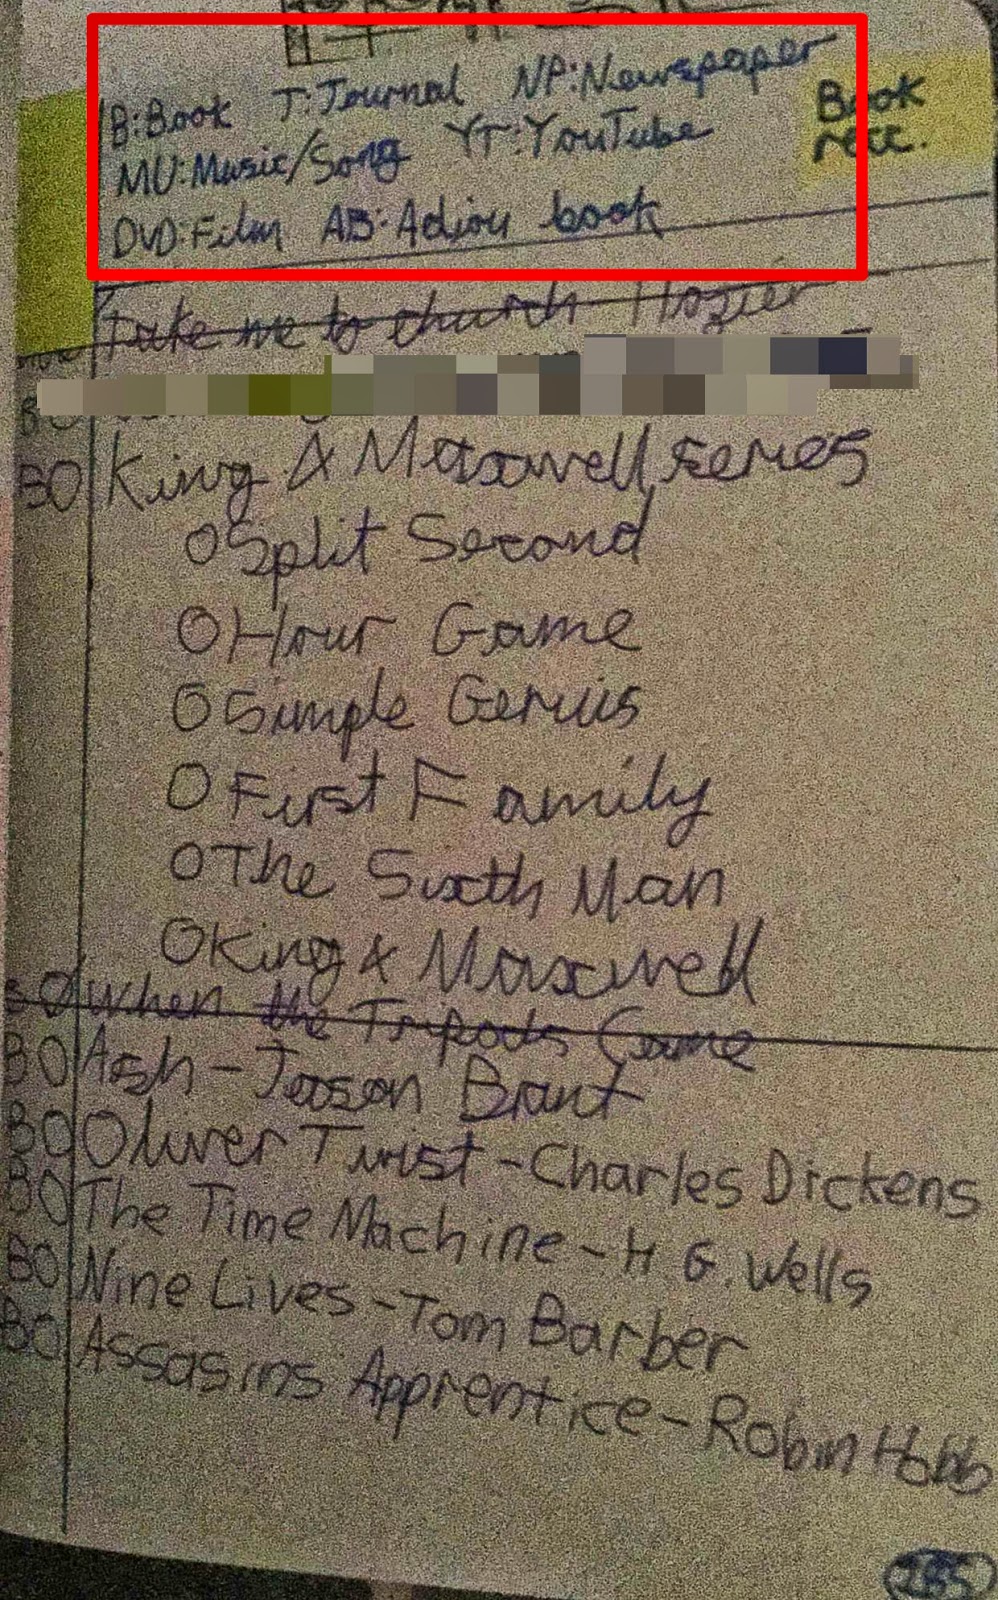 |
| The Book Recommendations tab |
One of my favorite bit of this hack is the key. My most used symbols are: @EN and @WL (EN for Evernote and WL for Wunderlist). I put these symbols and my other ones (see the image) in a context column, so I can easily scan down and see what’s important and what I need to add to what. This key can also be used as a second bookmark.
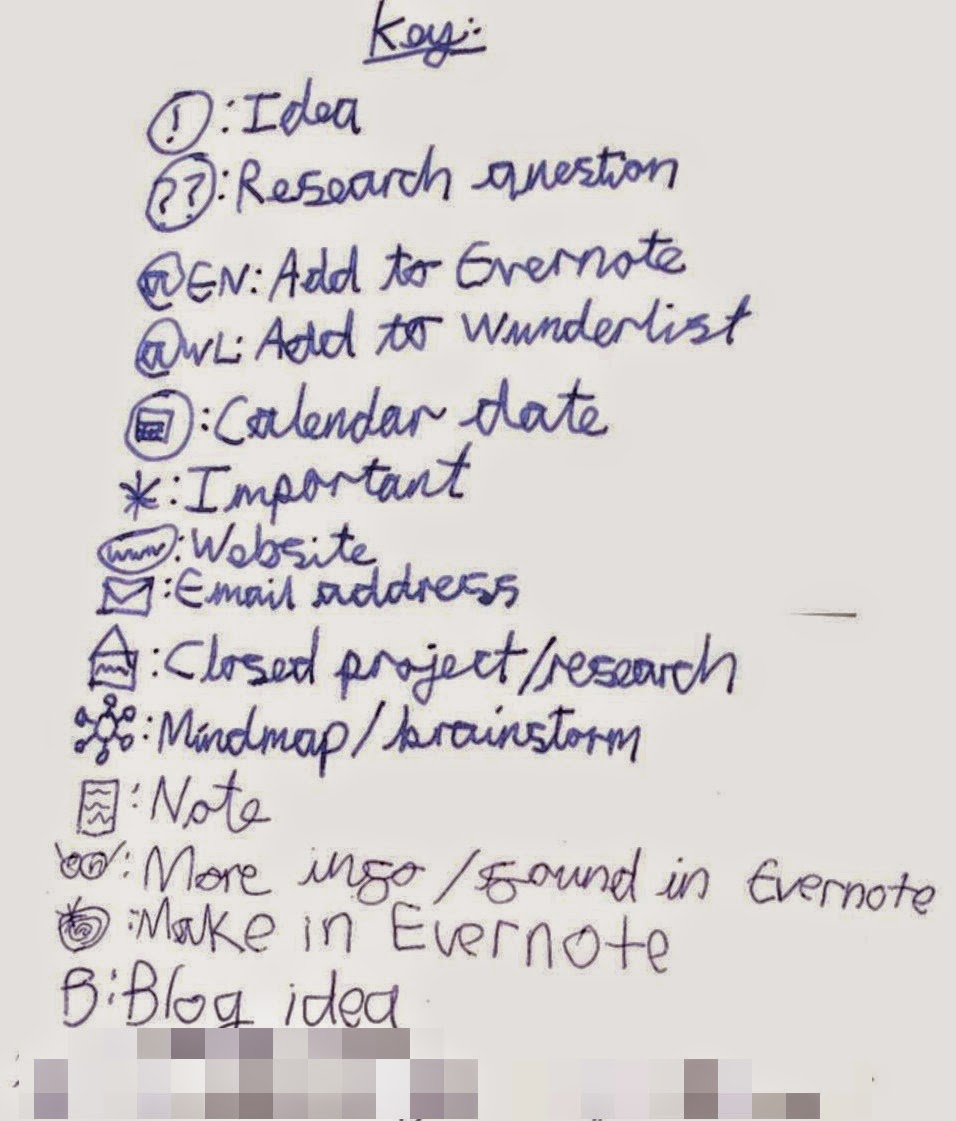 |
| The Key |
I then use sticky tabs so that I can easily find my way around; a yellow sticky tab means that there is active content on the page (to-dos that are not ticked off, notes that I am still using, dates I need to add to Calendars 5, e.t.c). A blue tab marks the current page that I am up to (the page which I can add more stuff to the sections).
I love my Moleskine, and the way I can quickly find what I want to do. I would recommend that you make one and try it out (if you want to) too.
Feel free to share pictures of how you hacked your Moleskine!
