Azumarill is a Water type Pokémon that evolves from Marill. This card is #114, in EX Delta Species. It is a Rare Holo card.
This Azumarill has 70 HP, and is a water type. It is weak to Electric type Pokémon. It has one move, however it does have a Poké-Body. It requires one Colourless energy to retreat it.
Azumarill’s Poké-Body is Thick Fat 0 damage done to Azumarill by Fire and Water type Pokémon is reduced by 30. This is a pretty good Poké-Body, as it can take most of the power out of normal Fire and Water type Pokémon.
Azumarill’s single move is Bubblebeam. Bubblebeam has a high energy cost for the damage it does, which is 40, but it does have a chance of paralysing your opponents Pokémon. It costs two Water energy, and one Colourless energy.
This Azumarill is a pretty good Pokémon. It has one good move, and a useful Poké-Body. It’s retreat cost is low for it’s moveset and HP. I would recommend that if you are building your deck you try it out, as a defense Pokémon against Water and Fire types when you are trying to develop your bench.
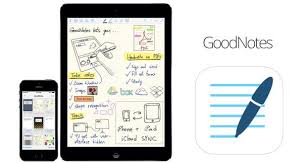
GoodNotes is packed with features, from a zoom windows to shape recognition, it is almost guaranteed that you will not have to go to any other app to take notes. You can synchronise your notes across your devices, and edit them on all of your other Apple devices. GoodNotes also offers an app for Macs, which allows you to view, edit and organise your notes on your Mac. I don’t have a Mac, so I can’t try out the desktop version, but it does look pretty cool.
Prior to using GoodNotes, I used Penultimate by Evernote. I loved it as it let me sync my notes to Evernote perfectly. However, I often found that the app was slow, and the palm recognition (even with my stylus connected) was not great. I sound the zoom window terrible, as it went whizzing on and leaving you struggling to cross your t’s and dot your i’s. However, the thing I found worst about it was that I would not write on pdfs. So I decided to get Notability, but the killer is that it could not connect to my stylus. But then I got GoodNotes, and it solved all my problems.
Using the zoom box
Its very quick and simple to get going with GoodNotes. Download the app, add a note and get going. You can add categories to sort and organize your notes, and you can also have master categories that contain categories, for example a master category named ‘School’ with ‘Maths’, ‘English’, ‘Physics’ and so on. So, you go into the category you want to write the note in, and then tap on the + symbol. Then, tap on create notebook. You can select a cover or have no cover, and then select the template you want to use. There are loads of templates that you can choose from, and you can also make your own.
So, you have chosen your template, and now your are in the notes view. On the top bar (or at the bottom, you can change where it is) is the tool bar. The buttons and functions are as follows (from left to right):
This allows you to go back to your category and see all of your notes there.
This gives you a view of all the pages in your document. It also allows you to re-arrange, bin, export your pages and many other options.
This allows you to insert things such as new pages, images from your library or camera, import pages and more.
The next button allows you to get shape recognition, which means that you can draw shapes and have them cleaned up and made to look like real shapes. This helps when you are drawing diagrams and other things like that.
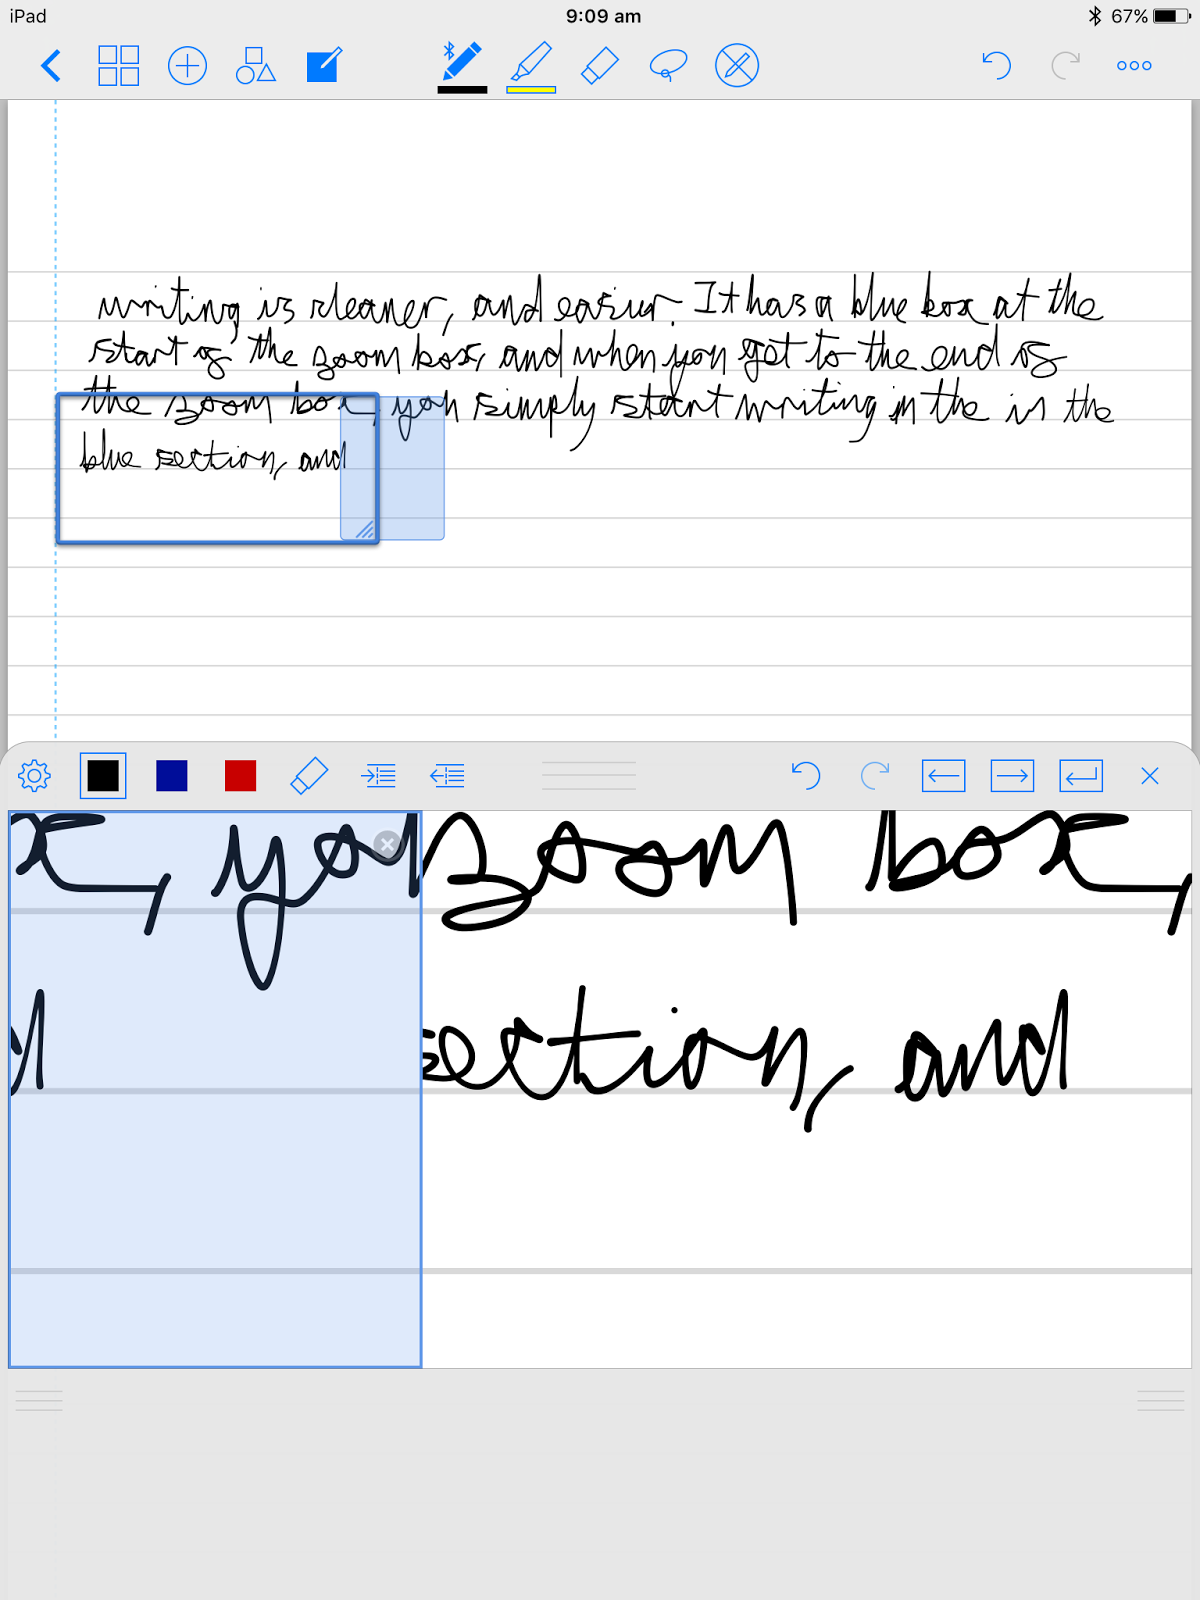
The zoom window is one of the most important features of GoodNotes. It allows you to have a zoomed view of a portion of the screen which means that writing is cleaner and easier. It has a blue box at the start of the zoom box, and when you get to the end of the zoom box, you simply write in the blue section, and it moves on. This is much better for your writing than the zoom box in Penultimate or Notability. This is because it allows you to just keep writing, and not have to rush to keep up with the zoom box. GoodNotes’ zoom box is in my opinion the best one I have ever used.
So those are the functions on the left section of the tool bar. The middle functions are the notetaking functions:
The first tool is the most important tool of GoodNotes; the pen. This is the tool that is used to write. If you connect a bluetooth stylus to GoodNotes, you will see a little bluetooth symbol. This tells you that you are connected to the app with a bluetooth stylus, such as the Adonit Jot Script. When you tap on the pen, it shows you options such as line thickness and colours. You can also add your own colours. In the zoom windows, there are three colours (quick access colours), and you can also change these.
The next tool is the highlighter. It allows you to make pieces of text stand out. Once again, if you tap on it, you can change the colour and thickness of it.
Next up is the rubber. It allows you to erase writing and highlights. One of the things I love about it is that there is an option to enable a feature called ‘auto-deselect’. This means that you tap on the rubber, erase the stroke that you don’t want, and when you remove your stylus from the screen, the pen is automatically selected again. This is a brilliant time saving feature. You can enable it by tapping on the rubber icon, tapping on the cog (settings) button, and then switching ‘auto-deselect’ on.
The lasso button is next. With it you can select text, and this brings up a menu of options you can do, such as convert to text, take a screenshot and many more things. Converting text works, but is not great. However, I think my handwriting is the problem and not the app. With the lasso button you can also move and resize the item you selected.
The final button allows you to scroll using one finger, not two. Its like your not holding a pen or a highlighter anymore.
So those are the editing tools that GoodNotes offer. They are quite advanced, and I have not found any problems with the tools. However, I do have a complaint about the rubber. Even if you have a stylus connected, the rubber works with a finger. I have set up the wrist position correctly, however I wish there was an option that allowed you to make the rubber stylus only, like the pen. That’s my only complaint about the tools.
On the right, there are the undo and redo buttons, which are self explanatory. Next to the is the ‘burger’ icon (the three circles next to each other). When you tap on this, you have ten options. The top one is clean the page. It then has export options, and you can select whether you want to export the current page, or the whole document. Then you have a print option, and you can choose whether you want to print all pages or just the one you are on. Search allows you to search your notes, including handwritten ones, and is surprisingly accurate. Smart stylus lets you connect your bluetooth stylus, and supports loads of them, such as Adonit styluses and Pencil by 53. More options allow you to change your wrist position (there is a menu in smart stylus which also allows you to do this). It also allows you to change your paper template. Tips gives you the tips you saw when you first opened the app. Then come the navigation options, which are self explanatory.
So those are all the options on the top bar. There’s quite a few.
GoodNotes is very reliable. I’ve been using it for a few weeks for a couple of hours every day and it has never crashed on me. However, it eats away your battery; if I look in my battery stats, GoodNotes has used the same amount of battery in the same amount of time in a 3D game I play. I really hope they sort this out. Anyway, back to the bright side. GoodNotes is very responsive with my stylus (which is an Adonit Jot Script 2 Evernote Edition), and it is easy to draw around diagrams. After I am done with a note, I export it as a PDF to a special Dropbox folder. This folder is linked with IFTTT. When I add a file to the Dropbox folder, IFTTT detects it and send an email via my Gmail to my Evernote email address with the PDF as an attachment and #goodnotes in the header (which adds a tag to the note). When I sync Evernote, it appears. This keeps me happy on the Evernote side of things.
One of the best features (in my opinion) is that when you export a PDF, your writing is recognised. This means that when I export my PDF to Readdle PDF Expert 5, I can select the text and copy and paste it, and I can also highlight it and do other things to it that I can do with normal text.
All in all, GoodNotes is a great app. The sheer amount of features it has put it on top of the pile of handwriting apps out there. I love the OCR, and the ability to connect my Jot Script to the app. I would love to see a feature that allows me to auto-export to Evernote, as well as a ‘Fit page to screen’ function; and please sort out battery consumption!
GoodNotes can be purchased from the App Store here for £5.99.
You can read this review that I wrote up on GoodNotes here.
You can get Zygarde for a limited time via Nintendo Network!
You can get Zygarde via the Nintendo Network from the 2nd of May to the 26th of May 2016. The Zygarde you will get is Lvl. 100, and knows its signature attack, as well as some other moves. It would be a powerful addition to your team.
A commonplace book is a great way to keep quotes, reading notes and many more things in. You may have read my post last week, but if you haven’t, you can check it out here (it would be a good idea to read it before reading this post). I have recently started keeping a commonplace book, and today’s post is about my commonplace book and how I use it.
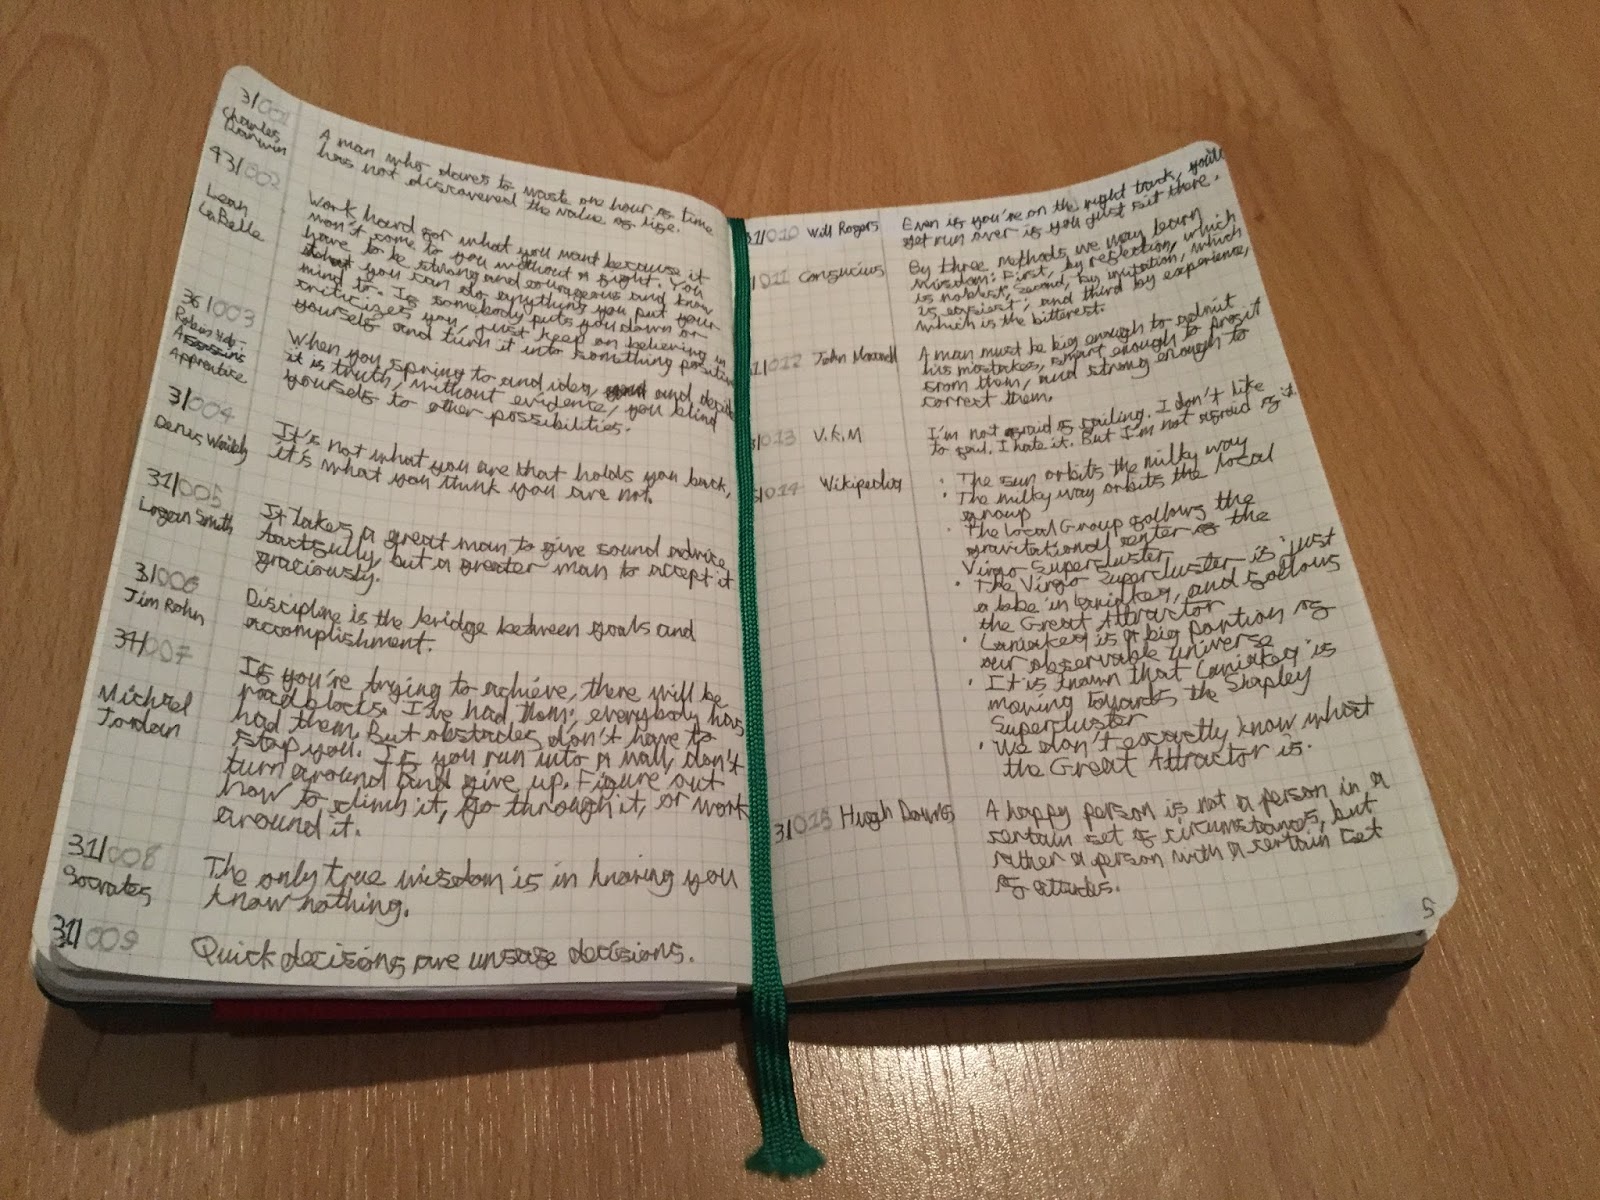
I use a green Moleskine large notebook, with square paper. At the front, I have 6 categories. My chosen organisational system is this:
I rule off 4 cm at the start. In here goes the entry category, the entry number and who wrote it.
Each category has a number, such as 3 for quotes. So, if I enter a quote, it gets the number 3 in front. If the quote is an inspirational quote, it will get 34 at the start.
After the category number, I put a horizontal line, and then enter the number of the entry. So, if the entry is the 50th entry in my commonplace book, and is a quote, it will get 3|050.
After I have entered the category and the entry number, I write the person who said the quote or the source. So, for example, if I had a quote by Albert Einstein, I would write 3|051 Albert Einstein.
My first spread in my commonplace book
I write the category of the entry in pen, and then the number of the entry in pencil. This makes it clearer, and means that the category and entry number do not merge together.
I put a red Moleskine tool belt on the front of my notebook to keep my pencil and pen together, and to keep a ruler handy. I also have a Filofax pocket calculator tucked in there. I would certainly recommend that you try out the Moleskine tool belt.
After I finish a spread in my commonplace book, I scan it into Evernote. I put it in my .Timeline book; this allows me to search my commonplace entries, and also means that I will have all my entries in the unlikely case that I forget my notebook.
So, that’s my commonplace book! If you haven’t already, you can check out my post on what a commonplace is and how to set one up here.
You can get Darkrai from GAME for free, and special plush Darkrai and Darkrai t-shirts can be purchased. If you purchase any Pokémon product, you also get a limited edition treat!
Head to your nearest GAME store to get a free Darkrai code for OMAS or X&Y games. Also make sure you bring along money to buy a Darkrai plush, along with other Pokémon themed objects such as Darkrai t-shirts. With any Pokémon purchase, you also get a rare limited edition Tangela card, which has a special Pokémon 20th on it. This means that it can increase in value, as it is an anniversary card!
You can read more on the official Pokémon site here.
The event starts on the 1st of May, and ends on the 24th of the same month.
A commonplace book is a great way to take down reading notes, quotes, knowledge, questions that arise from your studies and many other things; it’s shaped by you. It is a great idea, and I recommend that you try making one for yourself!
A commonplace book is a collection of quotes to reading notes. It reflects your personality, and your interests. For students, it can help you keep track of your educational journey. After you use it for a while, it will give you a record of what you’ve done and how you have changed.
Basically, a commonplace book is a compilation of information that the person writing it thinks is relevant. Commonplace books were used a lot in the 15th century, by writers including John Milton, Thomas Jefferson and Mark Twain among others.
My commonplace notebook is in a green Moleskine which is large size. I put a Moleskine tool belt on it to keep my pens, pencils and rulers in. I will write how I use my commonplace book in next week’s post!
Setting up your commonplace book
There are many ways that you can make a commonplace book. Some prefer to use analog ways such as notebooks or flash cards, whilst others prefer digital methods such as Evernote or Onenote. Personally, I prefer using an analog method. I do this because when I write down the quote or the reading note, I think it through. It also stays in my mind a bit more. However, when I finish a spread of pages in my commonplace book, I do scan it into my .Timeline notebook in Evernote, which allows me to search it.
Once you have chosen the medium you want to use, whether analog or digital, start collecting! The things found in most commonplace books are: quotes, knowledge, reading notes such as quotes, reactions of specific bits in the book and to the whole book in general, and book summaries in your own words.
Write in quotes you find from reading, or have a ‘discussion’ with the book. If you find something in the book you want to comment on, write it in your commonplace book!
This is your own book, so it is defined by you. You can put in anything you want to – recipes, quotes from movies, goals such as yearly goals and life goals, important photos, clippings from newspapers and anything else you can think of.
Once you have chosen what you want to put in it, you probably want to choose how you will organise it. You may want separate sections for each topic, such as reading and quotes. Or, you may prefer to have all your information in one place. You can see how I organise my commonplace book in next week’s post.
Once you have started your commonplace book, make sure you keep adding to it regularly!
Thanks for reading, and make sure you read next weeks post on how I use my commonplace book.
Reeder 3 for iPad is a great RSS app which allows you to synchronise your RSS feeds from different web apps such as Feedly and Inoreader, as well as a local sync.
Reeder 3 allows you to check your feeds from different services such as Feedly, Feedbin, Inoreader and many others. You can also use local sync if you do not have a web account. It also connects with Instapaper and Readability, which allows you to save articles for later.
Reeder checks your feeds when you go on the app, and then caches them. This allows you to read your feeds offline. You can mark as a article as favorite, and then tap on the star at the bottom to see all the articles marked as favorite; allowing you to quickly save articles you like.
The main reason I got Reeder is the ability to save articles to Evernote. I use Feedly, and you have to pay for a premium account to get the ability to save articles to services. I decided to invest in Reeder which would allow me to save my articles to Evernote. Reeder 3 costs £3.99, which is certainly worth it. When the app downloads and you open it, you can sign into your account(s), and then the app automatically fetches the feeds. You can also choose to only use local RSS feeds.
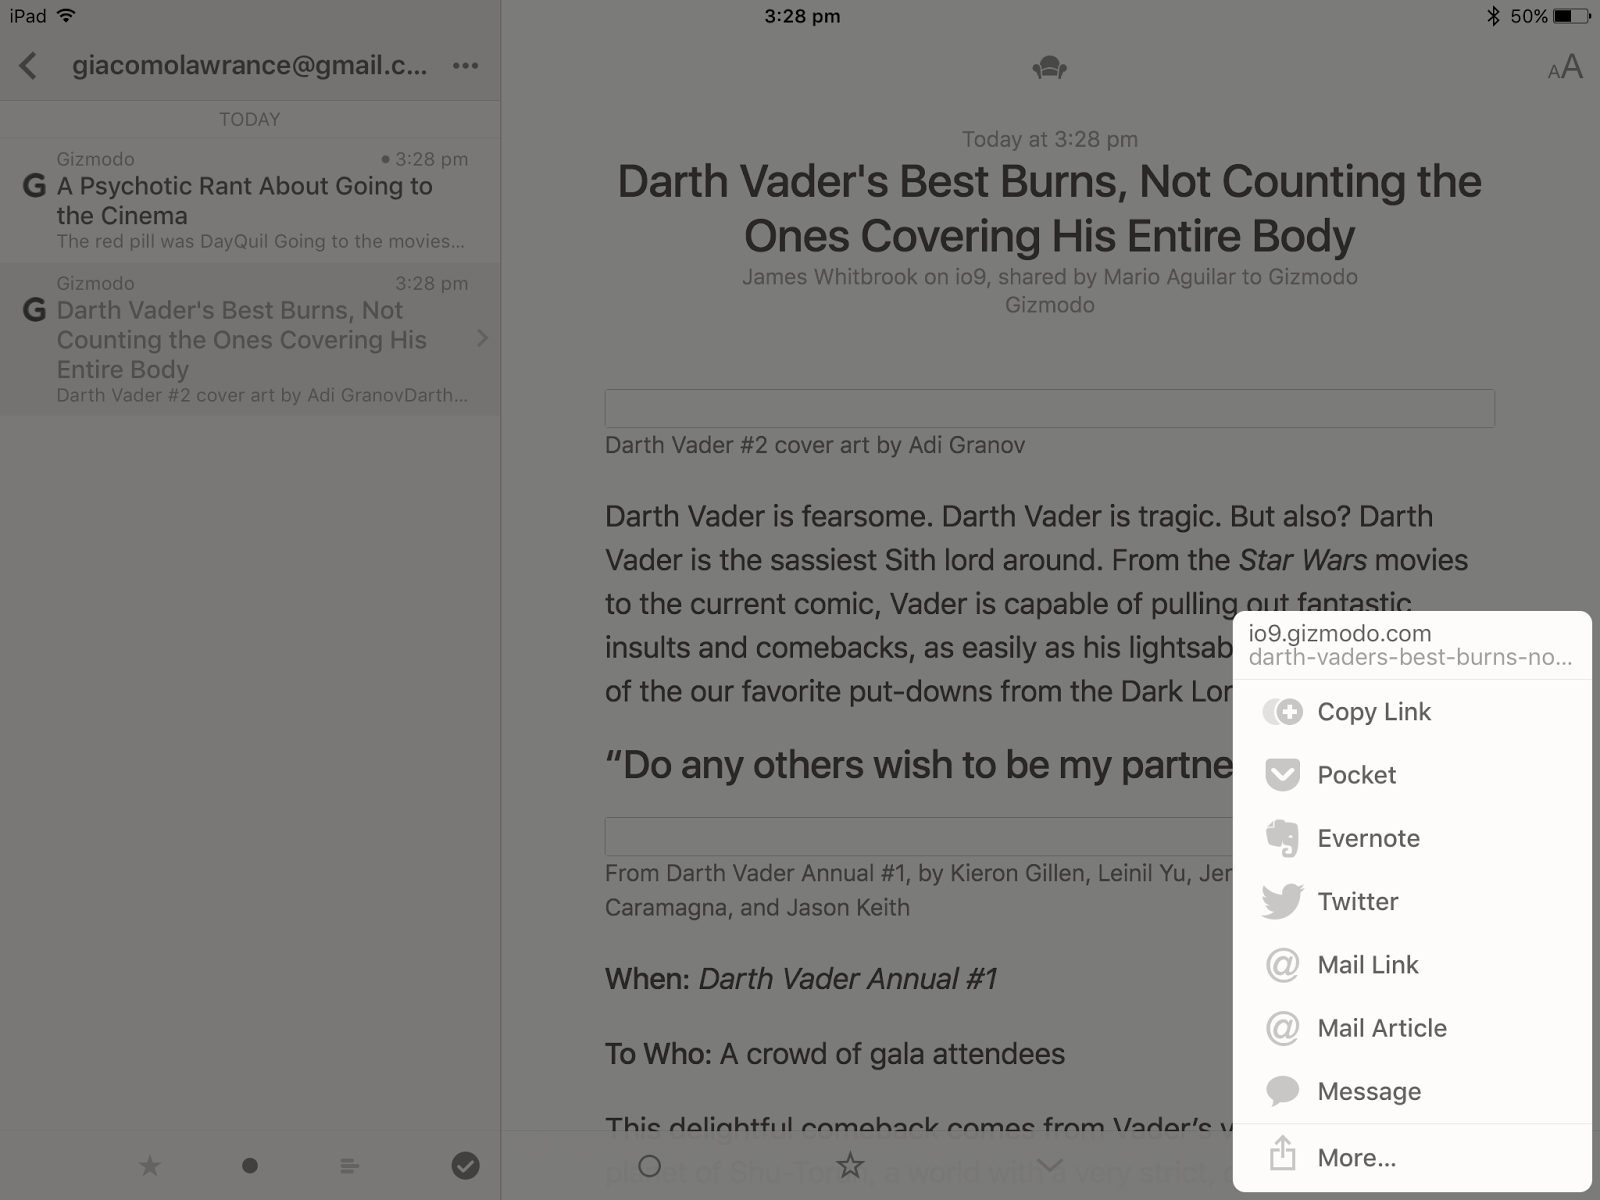
To share an article, simple tap on the sharing icon in the bottom right of article view; then tap on the service you want to share it to. You have to log in the first time you use that service, but you only need to do it once. When you share an article, a small box shows at the top of article view with the service you shared it to. This is a confirmation that you saved the article to that service. I also like the way that it does not obstruct the article, and it is very unobtrusive. I like to switch off the services I don’t use, as I find this cleans the sharing menu up a bit. You can do this by tapping on the cog at the top left of the accounts page. Saved articles come out great, looking like they did in the app.
Reeder is a great app, and I recommend that you try it out. The £3.99 is worth it, and you will be glad you did.